1. Introduction
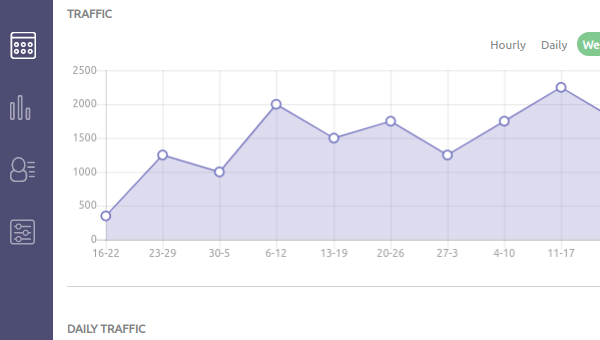
Web-App-Dashboard is a responsive dashboard template designed for web applications and admin consoles. The dashboard project comes with charts, Graphs, Widgets, Notifications, Alerts, and responsive menus. This template can be used as a base for more complex web applications.
2. Plugin Overview
| Library | Web-App-Dashboard |
| Author | Triantafyllos Famprikatzis |
| Licence | MIT Licence |
| Repository | GitHub |
| Dependencies | Chart.js 2.7.3 or Latest |
3. How to install and use Web-App-Dashboard jQuery plugin
Follow the below steps to install Web-App-Dashboard jQuery plugin on your website.
3.1. Load required Chart.js library and dashboard styles and JavaScript file:
<!-- Chart Js -->
<script src="https://cdnjs.cloudflare.com/ajax/libs/Chart.js/2.7.3/Chart.bundle.min.js"></script>

<!-- Main CSS for Dashboard -->
<link rel="stylesheet" href="css/styles.css">

<!-- Main JavaScript for Dashboard -->
<script src="script.js"></script>
3.2. Create header element with the following structrue:
 <header>
    <img class="logo" src="icons/logo.png" alt="logo">
    <div class="header-nav">
        <div class="notification">
            <img class="bell" id="js-bell" src="icons/icon-bell.svg" alt="bell">
            <p class="badge" id="badge-1"><strong class="badge-num">1</strong></p>
            <p class="badge" id="badge-2"><strong class="badge-num">2</strong></p>
            <p class="badge" id="badge-3"><strong class="badge-num">3</strong></p>
            <p class="badge" id="badge-4"><strong class="badge-num">4</strong></p>
            <ul class="notification-menu" id="notif-menu" style="display: none;">
                <li id="header-li"><strong>Notifications</strong></li>
                <li class="popuptext" id="li-1">
                    <img class="img" src="images/member-1.jpg" alt="member image">
                    <h3 class="name">Victoria Chambers</h3>
                    <p class="comment">What are your plans for tonight?</p>
                    <button class="btn-notif" type="button" name="delete">X</button>
                </li>
                <li class="popuptext" id="li-2">
                    <img class="img" src="images/member-2.jpg" alt="member image">
                    <h3 class="name">Dale Byrd</h3>
                    <p class="comment">Hey what's up?</p>
                    <button class="btn-notif" type="button" name="delete">X</button>
                </li>
                <li class="popuptext" id="li-3">
                    <img class="img" src="images/member-3.jpg" alt="member image">
                    <h3 class="name">Dawn Wood</h3>
                    <p class="comment">Just sent you a voice message</p>
                    <button class="btn-notif" type="button" name="delete">X</button>
                </li>
                <li class="popuptext" id="li-4">
                    <img class="img" src="images/member-4.jpg" alt="member image">
                    <h3 class="name">Dan Oliver</h3>
                    <p class="comment">Are you going to the game next week?</p>
                    <button class="btn-notif" type="button" name="delete">X</button>
                </li>
                <li class="popuptext popupalert" id="alert-bell" style="display: none;">
                    <h3>No new notifications</h3>
                </li>
            </ul>
        </div>
        <span class="border-notif"></span>
        <img class="profile-pic" src="images/josh.jpg" alt="User Avatar">
        <h3 class="profile-name">Josh Sullivan</h3>
    </div>
</header>
3.3. Add navigation panel:
<nav>
    <div class="side-nav" id="js-nav">
        <a href="#top" class="nav-icons nav-selected" id="btn-top"><img src="icons/icon-dashboard.svg" alt="dashboard"></a>
        <a href="#traffic" class="nav-icons" id="btn-traffic"><img src="icons/icon-visits.svg" alt="visits"></a>
        <a href="#activity" class="nav-icons" id="btn-activity"><img src="icons/icon-members.svg" alt="members"></a>
        <a href="#settings" class="nav-icons" id="btn-settings"><img src="icons/icon-settings.svg" alt="settings"></a>
    </div>
</nav>
3.4. Put other widgets in main panel with grid-main class:
<main class="grid-main">

</main>
4. Conclusion
In this article, we presented Web-App-Dashboard template that can be used to create beautiful responsive web applications. The project comes with many widgets and can be fully customized to your needs. All required resources (javascript and CSS files) are well described, so without a huge web programming knowledge, you can change the look and feel of this template and adapt it to your needs.
{{ 'Comments (%count%)' | trans {count:count} }}
{{ 'Comments are closed.' | trans }}