1. Introduction
In this tutorial, we will learn how to create Spring Boot application with Angular 11 on the frontend integrated with PostgreSQL database. The tutorial will include simple step-by-step instructions on how to create and connect all the pieces to built a fully-functional application for managing posts.
2. Architecture
The application will be constructed using the following architecture:

We can distinguish three main layers:
- front-end - with Angular 11 as the main framework, with Templates, Components and HTTP Client for communication with the REST-full application server,
- back-end - server side with Spring Boot, Spring REST Controllers, and Spring Data JPA for communication with the database,
- database - submitted data will be stored in the PostgreSQL database.
3. Back-end
3.1. Technology stack
- Java 8
- Spring Boot 2.3.1.RELEASE,
- PostgreSQL 11.5,
- Maven 3.6.1
3.2. Project structure
├── pom.xml
└── src
    ├── main
    │   ├── java
    │   │   └── com
    │   │       └── frontbackend
    │   │           └── springboot
    │   │               ├── Application.java
    │   │               ├── controller
    │   │               │   └── PostsController.java
    │   │               ├── model
    │   │               │   └── Post.java
    │   │               ├── repository
    │   │               │   └── PostRepository.java
    │   │               └── service
    │   │                   └── PostService.java
    │   └── resources
    │       └── application.properties
In the structure, we have:
Post- an entity class that is a Java representation of a database tableposts,PostRepository- interface reponsible for CRUD operations on tableposts,PostsController- a REST controller that handles API requests on/postsendpoint,application.properties- Spring Boot configuration file, contains important credencials for database connection,pom.xml- file with a Maven dependencies.
3.3. REST API Overview
Spring Boot application server will provide API with the following endpoints:
| URL | Method | Action |
| /posts | GET | Get list all created Posts |
| /posts?title={title} | GET | Get post list filtered by title |
| /posts | POST | Create new Post |
| /posts/{id} | GET | Get Post by specific id |
| /posts/{id} | DELETE | Delete Post by specific id |
| /posts/{id} | PUT | Update Post |
3.3. Setup the Spring Boot project
The pom.xml file have the following structure:
<?xml version="1.0" encoding="UTF-8"?>
<project xmlns="http://maven.apache.org/POM/4.0.0" xmlns:xsi="http://www.w3.org/2001/XMLSchema-instance"
         xsi:schemaLocation="http://maven.apache.org/POM/4.0.0 https://maven.apache.org/xsd/maven-4.0.0.xsd">
    <modelVersion>4.0.0</modelVersion>

    <groupId>com.frontbackend.springboot</groupId>
    <artifactId>angular10-spring-boot2-postgresql</artifactId>
    <version>0.0.1-SNAPSHOT</version>

    <!-- Inherit defaults from Spring Boot -->
    <parent>
        <groupId>org.springframework.boot</groupId>
        <artifactId>spring-boot-starter-parent</artifactId>
        <version>2.3.1.RELEASE</version>
    </parent>

    <!-- Add typical dependencies for a web application -->
    <dependencies>
        <dependency>
            <groupId>org.springframework.boot</groupId>
            <artifactId>spring-boot-starter-web</artifactId>
        </dependency>
        <dependency>
            <groupId>org.springframework.boot</groupId>
            <artifactId>spring-boot-starter-data-jpa</artifactId>
        </dependency>
        <dependency>
            <groupId>org.postgresql</groupId>
            <artifactId>postgresql</artifactId>
            <scope>runtime</scope>
        </dependency>
    </dependencies>

    <!-- Package as an executable jar -->
    <build>
        <plugins>
            <plugin>
                <groupId>org.springframework.boot</groupId>
                <artifactId>spring-boot-maven-plugin</artifactId>
            </plugin>
        </plugins>
    </build>
</project>
We used several dependencies here:
spring-boot-starter-web- used for building web applications with a Tomcat as a default web embedded container,spring-boot-starter-data-jpa- Spring Data JPA with Hibernate framework,postgresql- containes PostgreSQL database driver.
The latest versions of these dependencies could be found in the following links:
- org.springframework.boot : spring-boot-starter-web ,
- org.springframework.boot : spring-boot-starter-data-jpa ,
- org.postgresql : postgresql .
3.4. Spring Boot configuration
The application.properties is placed in src/main/resources folder, and contains the following entries:
spring.datasource.url=jdbc:postgresql://localhost:5432/testdb
spring.datasource.username=username
spring.datasource.password=password

spring.jpa.properties.hibernate.jdbc.lob.non_contextual_creation=true
spring.jpa.properties.hibernate.dialect=org.hibernate.dialect.PostgreSQLDialect

spring.jpa.hibernate.ddl-auto=create
spring.datasource.usernameandspring.datasource.password- the credentials used to connect with PostgreSQL database,spring.datasource.url- contains database connection URL,spring.jpa.properties.hibernate.dialect- here we need to useorg.hibernate.dialect.PostgreSQLDialectin order to connect JPA with PostgreSQL,spring.jpa.hibernate.ddl-auto- parameter that control export schema DDL to the database, available values are:- validate - validate the schema, makes no changes to the database,
- update - update the schema,
- create - creates the schema, destroying previous data,
- create-drop - drop the schema at the end of the session,
- none - is all other cases.
Note that spring.jpa.hibernate.ddl-auto should be switched off in a production environment.
3.5. Entity class
The Post is our entity class that represents table posts in the PostgreSQL database. It contains fiels such as:
- id - post id that will be autogenerated UUID,
- title - post title,
- content - post content,
- published flag that tell if post is published,
- tags - post tags.
package com.frontbackend.springboot.model;

import javax.persistence.Entity;
import javax.persistence.GeneratedValue;
import javax.persistence.Id;
import javax.persistence.Table;

import org.hibernate.annotations.GenericGenerator;

@Entity
@Table(name = "posts")
public class Post {

    @Id
    @GeneratedValue(generator = "uuid")
    @GenericGenerator(name = "uuid", strategy = "uuid2")
    private String id;

    private String title;

    private String content;

    private boolean published;

    private String tags;

    // getters and setters
}
We used some interesting annotation here, like:
@Entity- indicates that the class is a persistent Java object.@Table- provides a database table that this entity class will represent,@Id- mark a primary key,@GenericGenerator- used to automatically generating id for newposts,@GeneratedValue- define the generation strategy for the primary key.
3.6. Post Request
For the REST request, we prepared a simple POJO object PostRequest that will be used for creating and updating posts.
package com.frontbackend.springboot.model;

public class PostRequest {

    private String title;
    private String content;
    private String tags;
    private boolean published;

    // setters and getters
}
3.7. Repository interface
The PostRepository is used for interaction with PostgreSQL database. It extends JpaRepository that allows us to used CRUD methods like save(), delete(), findAll(), deleteById() etc.
package com.frontbackend.springboot.repository;

import java.util.List;

import org.springframework.data.jpa.repository.JpaRepository;
import org.springframework.stereotype.Repository;

import com.frontbackend.springboot.model.Post;

@Repository
public interface PostRepository extends JpaRepository<Post, String> {

    List<Post> findAllByTitleContaining(String title);
}
We also added findAllByTitleContaining(...) method that will be searching for posts with a title that contains a specific string.
3.8. Service
The service class PostService is used to separate logic used for managing posts, and to avoid many lines of code in the PostsController:
package com.frontbackend.springboot.service;

import java.util.List;
import java.util.Optional;

import org.springframework.beans.factory.annotation.Autowired;
import org.springframework.stereotype.Service;

import com.frontbackend.springboot.model.Post;
import com.frontbackend.springboot.model.PostRequest;
import com.frontbackend.springboot.repository.PostRepository;

@Service
public class PostService {

    private final PostRepository postRepository;

    @Autowired
    public PostService(PostRepository postRepository) {
        this.postRepository = postRepository;
    }

    public Optional<Post> findById(String id) {
        return postRepository.findById(id);
    }

    public void changePublishedFlag(String id, PostRequest request) {
        Optional<Post> post = findById(id);
        if (post.isPresent()) {
            Post p = post.get();
            p.setPublished(request.isPublished());
            postRepository.save(p);
        }
    }

    public String save(PostRequest request) {
        Post post = new Post();
        post.setTitle(request.getTitle());
        post.setContent(request.getContent());
        post.setPublished(false);
        post.setTags(request.getTags());

        return postRepository.save(post)
                             .getId();
    }

    public void update(String id, PostRequest request) {
        Optional<Post> post = findById(id);
        if (post.isPresent()) {
            Post forUpdate = post.get();
            forUpdate.setContent(request.getContent());
            forUpdate.setTitle(request.getTitle());
            forUpdate.setTags(request.getTags());
            postRepository.save(forUpdate);
        }
    }

    public List<Post> getAll() {
        return postRepository.findAll();
    }

    public List<Post> findByTitle(String title) {
        return postRepository.findAllByTitleContaining(title);
    }

    public void delete(String id) {
        Optional<Post> post = findById(id);
        post.ifPresent(postRepository::delete);
    }
}
3.9. REST Controller
Spring REST controller is used to handle requests to /api/posts endpoint.
package com.frontbackend.springboot.controller;

import java.util.List;
import java.util.Optional;

import org.springframework.beans.factory.annotation.Autowired;
import org.springframework.http.ResponseEntity;
import org.springframework.util.StringUtils;
import org.springframework.web.bind.annotation.CrossOrigin;
import org.springframework.web.bind.annotation.DeleteMapping;
import org.springframework.web.bind.annotation.GetMapping;
import org.springframework.web.bind.annotation.PathVariable;
import org.springframework.web.bind.annotation.PostMapping;
import org.springframework.web.bind.annotation.PutMapping;
import org.springframework.web.bind.annotation.RequestBody;
import org.springframework.web.bind.annotation.RequestMapping;
import org.springframework.web.bind.annotation.RequestParam;
import org.springframework.web.bind.annotation.RestController;

import com.frontbackend.springboot.model.Post;
import com.frontbackend.springboot.model.PostRequest;
import com.frontbackend.springboot.service.PostService;

@CrossOrigin(origins = "http://localhost:8081")
@RestController
@RequestMapping("/api/posts")
public class PostsController {

    private final PostService postService;

    @Autowired
    public PostsController(PostService postService) {
        this.postService = postService;
    }

    @GetMapping("{id}")
    public ResponseEntity<Post> post(@PathVariable String id) {
        Optional<Post> post = postService.findById(id);
        return post.map(ResponseEntity::ok)
                   .orElseGet(() -> ResponseEntity.notFound()
                                                  .build());
    }

    @GetMapping
    public List<Post> list(@RequestParam(required = false) String title) {
        if (StringUtils.isEmpty(title)) {
            return postService.getAll();
        }
        return postService.findByTitle(title);
    }

    @PostMapping
    public String save(@RequestBody PostRequest request) {
        return postService.save(request);
    }

    @PutMapping("{id}/publish")
    public void publishUnpublish(@PathVariable String id, @RequestBody PostRequest request) {
        postService.changePublishedFlag(id, request);
    }

    @PutMapping("{id}")
    public void update(@PathVariable String id, @RequestBody PostRequest request) {
        Optional<Post> post = postService.findById(id);
        if (post.isPresent()) {
            postService.update(id, request);
        } else {
            postService.save(request);
        }
    }

    @DeleteMapping("{id}")
    public void delete(@PathVariable String id) {
        postService.delete(id);
    }
}
The annotations we used in this class are as follows:
@RestControllerto mark a class as a REST controller,@CrossOriginto allow cross-domain requests fromhttp://localhost:8081- the port on which angular will be served,@RequestMappingto connect a specific endpoint with this particular class.
4. Front-end
4.1. Project structure
├── package.json
├── package-lock.json
├── README.md
├── src
│   ├── app
│   │   ├── app.component.css
│   │   ├── app.component.html
│   │   ├── app.component.ts
│   │   ├── app.module.ts
│   │   ├── app-routing.module.ts
│   │   ├── components
│   │   │   ├── post-form
│   │   │   │   ├── post-form.component.html
│   │   │   │   └── post-form.component.ts
│   │   │   └── post-list
│   │   │       ├── post-list.components.html
│   │   │       └── post-list.component.ts
│   │   ├── model
│   │   │   └── post.model.ts
│   │   └── services
│   │       └── post.service.ts
│   ├── favicon.ico
│   ├── index.html
│   ├── main.ts
│   ├── polyfills.ts
│   └── styles.css
- Front-end Angular 11 project contains two components:
post-formandpost-list, post.serviceis responsible for communication with REST api,post.modelis Post representation in JavaScript object (with fields like title, content, tags, id),app.moduleis an Angular main module where we imported modules likeFormsandHttpClient,app.routing.modulecontains URL with Angular Component matches.
To generate Angular 11 initial workspace we need to run the following commands:
> ng new angular --minimal
Note that if the --minimal flag is set, ng will create an initial application without any testing frameworks.
Next, we need to create a service and components:
> ng g s services/post
> ng g c components/post-form
> ng g c components/post-list
4.2. Model
Model object contains fields like id, title, content, tags, published. The same fields exist in the entity class in Java:
export class Post {
  id?: any;
  title?: string;
  content?: string;
  tags?: string;
  published?: boolean;
}
4.2. Post service
The PostService is an HTTP Client that will be responsible for communication with a Spring Boot Rest-full API.
import { Injectable } from '@angular/core';
import { HttpClient } from '@angular/common/http';
import { Observable } from 'rxjs';
import { Post } from '../model/post.model';

const baseUrl = 'http://localhost:8080/api/posts';

@Injectable({
  providedIn: 'root'
})
export class PostService {

  constructor(private http: HttpClient) {
  }

  list(): Observable<any> {
    return this.http.get(baseUrl);
  }

  get(id: string): Observable<any> {
    return this.http.get(`${baseUrl}/${id}`);
  }

  create(data: Post): Observable<any> {
    return this.http.post(baseUrl, data);
  }

  update(id: string, data: Post): Observable<any> {
    return this.http.put(`${baseUrl}/${id}`, data);
  }

  publishUnpublish(id: string, data: Post): Observable<any> {
    return this.http.put(`${baseUrl}/${id}/publish`, data);
  }

  delete(id: string): Observable<any> {
    return this.http.delete(`${baseUrl}/${id}`);
  }

  findByTitle(title: string): Observable<any> {
    return this.http.get(`${baseUrl}?title=${title}`);
  }
}
4.2. Post list component
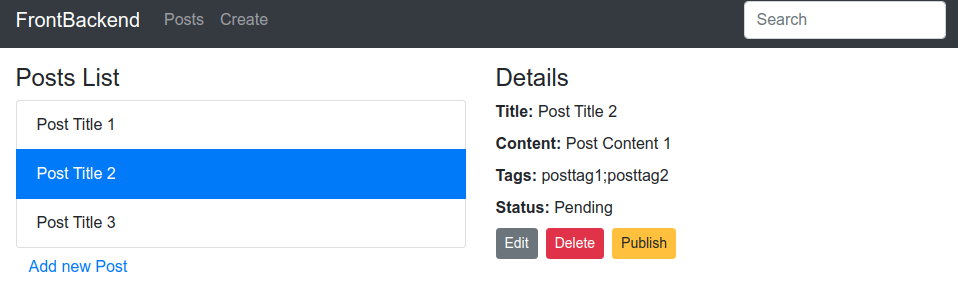
The post list component presents a list of posts that could be selected. If a single post has been selected on the right side we will see details about that post with options like Edit, Publish/Unpublish, Delete. The implementation of this component looks as follows:
import { Component, OnInit } from '@angular/core';
import { Post } from '../../model/post.model';
import { PostService } from '../../services/post.service';
import { ActivatedRoute } from '@angular/router';

@Component({
  selector: 'app-post-list',
  templateUrl: './post-list.components.html'
})
export class PostListComponent implements OnInit {

  posts?: Post[];
  selected?: Post;
  currentIndex: number = -1;
  title: string = '';
  message: string = '';

  constructor(private postService: PostService, private route: ActivatedRoute) {
  }

  ngOnInit(): void {
    this.route.queryParams
      .subscribe(params => {
          if (params.title) {
            this.getPostsByTitle(params.title);
          } else {
            this.getPosts();
          }
        }
      );
  }

  getPostsByTitle(title: string): void {
    this.postService.findByTitle(title)
      .subscribe(
        data => {
          this.posts = data;
        },
        error => {
          console.error(error);
        });
  }

  getPosts(): void {
    this.postService.list()
      .subscribe(
        data => {
          this.posts = data;
        },
        error => {
          console.error(error);
        });
  }

  refreshList(): void {
    this.getPosts();
    this.selected = undefined;
    this.currentIndex = -1;
  }

  setSelected(post: Post, index: number): void {
    if (this.selected && this.selected.id == post.id) {
      this.selected = undefined;
      this.currentIndex = -1;
    } else {
      this.selected = post;
      this.currentIndex = index;
    }
  }

  searchTitle(): void {
    this.selected = undefined;
    this.currentIndex = -1;

    this.postService.findByTitle(this.title)
      .subscribe(
        data => {
          this.posts = data;
        },
        error => {
          console.error(error);
        });
  }

  deletePost(): void {
    if (!this.selected) {
      return;
    }

    this.postService.delete(this.selected.id)
      .subscribe(
        response => {
          this.refreshList();
        },
        error => {
          console.error(error);
        });
  }

  updatePublished(status: boolean): void {
    if (!this.selected) {
      return;
    }

    const data = {
      id: this.selected.id,
      published: status
    };

    this.message = '';

    this.postService.publishUnpublish(this.selected.id, data)
      .subscribe(
        response => {
          if (this.selected) {
            this.selected.published = status;
          }
        },
        error => {
          console.error(error);
        });
  }
}
4.2. Post form component
Post form component will be used to create new posts and also edit an existing one.
import { Component, OnInit } from '@angular/core';
import { PostService } from '../../services/post.service';
import { ActivatedRoute, Router } from '@angular/router';
import { Post } from '../../model/post.model';

@Component({
  selector: 'app-post-form',
  templateUrl: './post-form.component.html'
})
export class PostFormComponent implements OnInit {

  post: Post = {
    title: '',
    content: '',
    tags: '',
    published: false
  };
  message = '';

  constructor(
    private postService: PostService,
    private route: ActivatedRoute,
    private router: Router) {
  }

  ngOnInit(): void {
    this.message = '';
    const id = this.route.snapshot.params.id;
    if (id) {
      this.editPost(this.route.snapshot.params.id);
    }
  }

  editPost(id: string): void {
    this.postService.get(id)
      .subscribe(
        data => {
          this.post = data;
        },
        error => {
          console.error(error);
        });
  }

  savePost(): void {
    this.message = '';

    if (this.post.id) {
      this.saveEditedPost();
    } else {
      this.createNewPost();
    }
  }

  private createNewPost() {
    this.postService.create(this.post)
      .subscribe(
        response => {
          this.router.navigate([ '/posts' ]);
        },
        error => {
          console.error(error);
          this.message = 'An error occurred while saving post';
        });
  }

  private saveEditedPost() {
    this.postService.update(this.post.id, this.post)
      .subscribe(
        response => {
          this.router.navigate([ '/posts' ]);
        },
        error => {
          console.error(error);
          this.message = 'An error occurred while saving post';
        });
  }
}
5. Run and Test Application
To run back-end Spring Boot application server we need to run:
mvn spring-boot:run
or
java -jar target/angular11-spring-boot2-postgresql-0.0.1-SNAPSHOT.jar
To start front-end application run:
ng serve
to change the listening port run the following command:
ng serve --port 8888
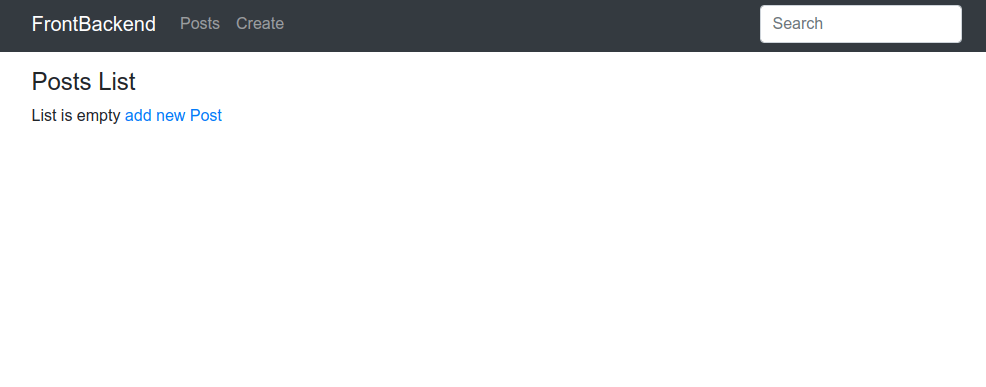
5.1. Post list
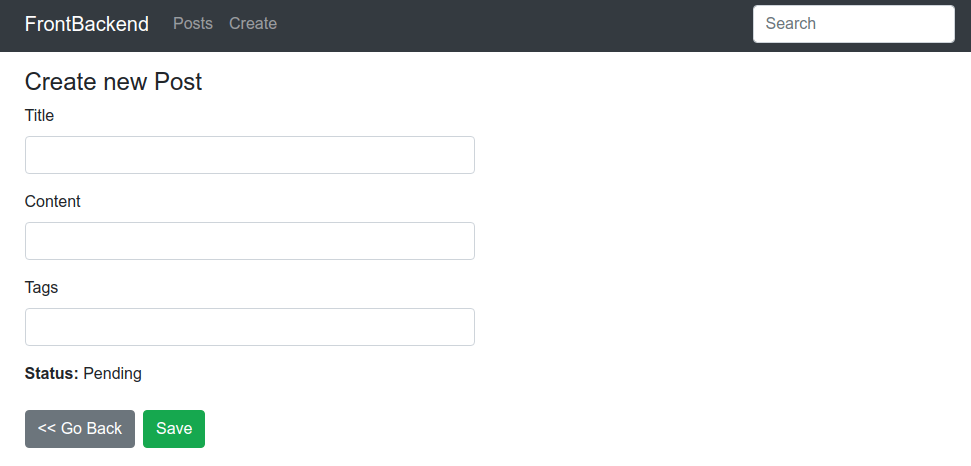
5.2. Create new post
5.3. List with selected post
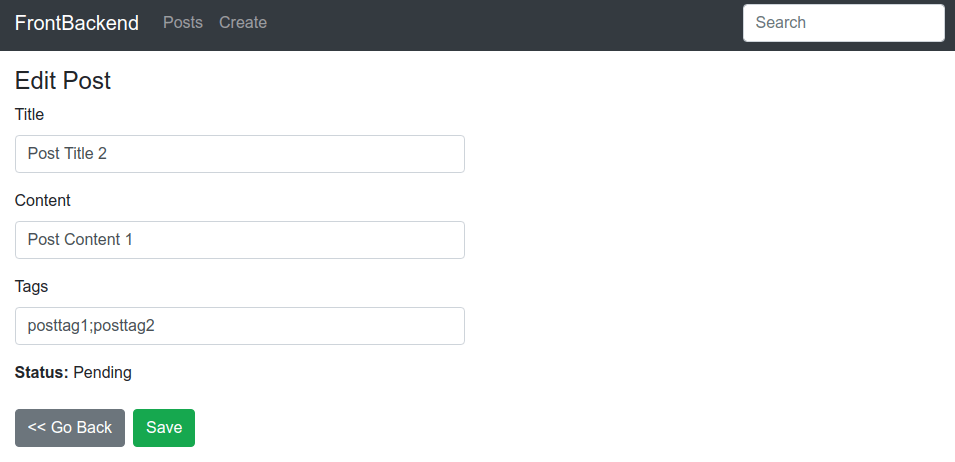
5.4. Edit post
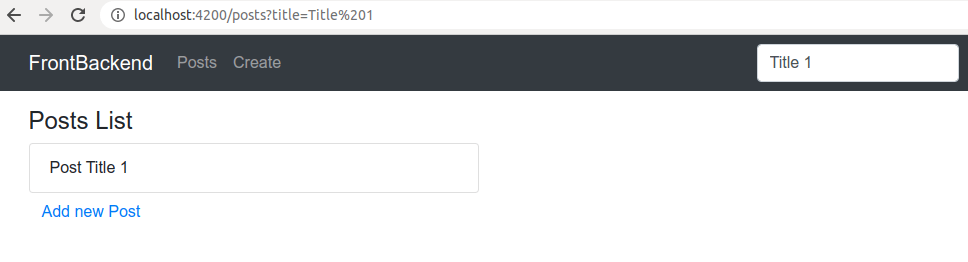
5.5. Filter posts by title
6. Conclusion
In this tutorial, we presented how to create a Spring Boot application with Angular 11. The sample application for managing posts should cover the most useful integrations such as:
- Angular HttpClient -> Spring Boot Controller,
- Spring Data Jpa -> PostgreSQL database.
As usual, the code used in this tutorial is available in our GitHub repository. You can clone it, and change it according to your needs. Have fun!
{{ 'Comments (%count%)' | trans {count:count} }}
{{ 'Comments are closed.' | trans }}