1. Introduction
In this article, we will show how to upload a file with Spring Boot to a folder located in the filesystem. We will use Spring MultipartFile interface to handle multi-part requests to our Rest API.
2. Application Rest uploading API
Spring Boot application server will provide API with the following endpoints:
| URL | Method | Action |
| /files | GET | Get list of uploaded files |
| /files | POST | Upload a single file |
| /files | DELETE | Delete all uploaded files |
| /files/{filename} | GET | Download specific file |
Files will be uploaded into the specific static folder which will be configured in the application.properties.
3. Project structure
The following presents a Maven project structure of the upload file application:
├── pom.xml
├── src
│   ├── main
│   │   ├── java
│   │   │   └── com
│   │   │       └── frontbackend
│   │   │           └── springboot
│   │   │               ├── Application.java
│   │   │               ├── controller
│   │   │               │   └── FilesController.java
│   │   │               ├── exceptions
│   │   │               │   └── RestExceptionHandler.java
│   │   │               ├── model
│   │   │               │   ├── FileData.java
│   │   │               │   └── UploadResponseMessage.java
│   │   │               └── service
│   │   │                   └── FileService.java
│   │   └── resources
│   │       └── application.properties
In this structure the following elements can be distinguished:
pom.xmlis a Maven configuration file with all necessary dependencies,Application- the main Spring Boot class that starts the application server,FilesController- class that handle HTTP requests,FileService- service class responsible for saving uploaded file in the filesystem and retrieving uploaded files,RestExceptionHandler- handlesMaxUploadSizeExceededExceptionwhen processing file (could be extended with other exceptions as well),FileData- contains information about the uploaded file like name, size, location,application.properties- Spring Boot application properties with a path for uploaded files.
4. Setup Spring Boot application
To create a Spring Boot project from scratch we could use Initializer or other development tools available in Eclipse or IntelliJ.
The pom.xml has the following structure:
<?xml version="1.0" encoding="UTF-8"?>
<project xmlns="http://maven.apache.org/POM/4.0.0" xmlns:xsi="http://www.w3.org/2001/XMLSchema-instance"
         xsi:schemaLocation="http://maven.apache.org/POM/4.0.0 https://maven.apache.org/xsd/maven-4.0.0.xsd">
    <modelVersion>4.0.0</modelVersion>

    <groupId>com.frontbackend.springboot</groupId>
    <artifactId>upload-file-into-filesystem</artifactId>
    <version>0.0.1-SNAPSHOT</version>

    <!-- Inherit defaults from Spring Boot -->
    <parent>
        <groupId>org.springframework.boot</groupId>
        <artifactId>spring-boot-starter-parent</artifactId>
        <version>2.1.5.RELEASE</version>
    </parent>

    <!-- Add typical dependencies for a web application -->
    <dependencies>
        <dependency>
            <groupId>org.springframework.boot</groupId>
            <artifactId>spring-boot-starter-web</artifactId>
        </dependency>
    </dependencies>

    <!-- Package as an executable jar -->
    <build>
        <plugins>
            <plugin>
                <groupId>org.springframework.boot</groupId>
                <artifactId>spring-boot-maven-plugin</artifactId>
            </plugin>
        </plugins>
    </build>

</project>
We added spring-boot-starter-web dependency and used spring-boot-maven-plugin plugin to create a jar executable file in /target folder.
5. Project classes
5.1. Create FileService for managing files
The FileService will be responsible for saving and downloading files from the path provided in application.properties. We used a method annotated with @PostConstruct that will create an empty directory (if it does not exist already) at the start of the Spring Boot server.
package com.frontbackend.springboot.service;

import java.io.IOException;
import java.net.MalformedURLException;
import java.nio.file.Files;
import java.nio.file.Path;
import java.nio.file.Paths;
import java.util.Collections;
import java.util.List;
import java.util.stream.Collectors;

import javax.annotation.PostConstruct;

import org.springframework.beans.factory.annotation.Value;
import org.springframework.core.io.Resource;
import org.springframework.core.io.UrlResource;
import org.springframework.stereotype.Service;
import org.springframework.util.FileSystemUtils;
import org.springframework.web.multipart.MultipartFile;

@Service
public class FileService {

    @Value("${upload.path}")
    private String uploadPath;

    @PostConstruct
    public void init() {
        try {
            Files.createDirectories(Paths.get(uploadPath));
        } catch (IOException e) {
            throw new RuntimeException("Could not create upload folder!");
        }
    }

    public void save(MultipartFile file) {
        try {
            Path root = Paths.get(uploadPath);
            if (!Files.exists(root)) {
                init();
            }
            Files.copy(file.getInputStream(), root.resolve(file.getOriginalFilename()));
        } catch (Exception e) {
            throw new RuntimeException("Could not store the file. Error: " + e.getMessage());
        }
    }

    public Resource load(String filename) {
        try {
            Path file = Paths.get(uploadPath)
                             .resolve(filename);
            Resource resource = new UrlResource(file.toUri());

            if (resource.exists() || resource.isReadable()) {
                return resource;
            } else {
                throw new RuntimeException("Could not read the file!");
            }
        } catch (MalformedURLException e) {
            throw new RuntimeException("Error: " + e.getMessage());
        }
    }

    public void deleteAll() {
        FileSystemUtils.deleteRecursively(Paths.get(uploadPath)
                                               .toFile());
    }

    public List<Path> loadAll() {
        try {
            Path root = Paths.get(uploadPath);
            if (Files.exists(root)) {
                return Files.walk(root, 1)
                            .filter(path -> !path.equals(root))
                            .collect(Collectors.toList());
            }

            return Collections.emptyList();
        } catch (IOException e) {
            throw new RuntimeException("Could not list the files!");
        }
    }
}
5.2. Create Model classes: FileData and UploadResponseMessage
The model layer will contain:
FileData- object with field like filename, url(to download file) and size,UploadResponseMessage- will be used to return information about how uploading process ran.
package com.frontbackend.springboot.model;

public class FileData {

    private String filename;
    private String url;
    private Long size;

    public String getFilename() {
        return filename;
    }

    public void setFilename(String filename) {
        this.filename = filename;
    }

    public String getUrl() {
        return url;
    }

    public void setUrl(String url) {
        this.url = url;
    }

    public Long getSize() {
        return size;
    }

    public void setSize(Long size) {
        this.size = size;
    }
}
The UploadResponseMessage class will be used in FilesController and RestExceptionHandler.
package com.frontbackend.springboot.model;

public class UploadResponseMessage {

    private final String responseMessage;

    public UploadResponseMessage(String responseMessage) {
        this.responseMessage = responseMessage;
    }

    public String getResponseMessage() {
        return responseMessage;
    }
}
5.3. Create FilesController main Rest controller for handing uploading and downloading files
In the controller package, we created the FilesController class that will be responsible for handing all POST, GET, and DELETE requests to /files endpoint.
package com.frontbackend.springboot.controller;

import java.io.IOException;
import java.nio.file.Files;
import java.nio.file.Path;
import java.util.List;
import java.util.stream.Collectors;

import org.springframework.beans.factory.annotation.Autowired;
import org.springframework.core.io.Resource;
import org.springframework.http.HttpHeaders;
import org.springframework.http.HttpStatus;
import org.springframework.http.ResponseEntity;
import org.springframework.web.bind.annotation.DeleteMapping;
import org.springframework.web.bind.annotation.GetMapping;
import org.springframework.web.bind.annotation.PathVariable;
import org.springframework.web.bind.annotation.PostMapping;
import org.springframework.web.bind.annotation.RequestMapping;
import org.springframework.web.bind.annotation.RequestParam;
import org.springframework.web.bind.annotation.ResponseBody;
import org.springframework.web.bind.annotation.RestController;
import org.springframework.web.multipart.MultipartFile;
import org.springframework.web.servlet.mvc.method.annotation.MvcUriComponentsBuilder;

import com.frontbackend.springboot.model.FileData;
import com.frontbackend.springboot.model.UploadResponseMessage;
import com.frontbackend.springboot.service.FileService;

@RestController
@RequestMapping("files")
public class FilesController {

    private final FileService fileService;

    @Autowired
    public FilesController(FileService fileService) {
        this.fileService = fileService;
    }

    @PostMapping
    public ResponseEntity<UploadResponseMessage> uploadFile(@RequestParam("file") MultipartFile file) {
        try {
            fileService.save(file);

            return ResponseEntity.status(HttpStatus.OK)
                                 .body(new UploadResponseMessage("Uploaded the file successfully: " + file.getOriginalFilename()));
        } catch (Exception e) {
            return ResponseEntity.status(HttpStatus.EXPECTATION_FAILED)
                                 .body(new UploadResponseMessage("Could not upload the file: " + file.getOriginalFilename() + "!"));
        }
    }

    @GetMapping
    public ResponseEntity<List<FileData>> getListFiles() {
        List<FileData> fileInfos = fileService.loadAll()
                                              .stream()
                                              .map(this::pathToFileData)
                                              .collect(Collectors.toList());

        return ResponseEntity.status(HttpStatus.OK)
                             .body(fileInfos);
    }

    @DeleteMapping
    public void delete() {
        fileService.deleteAll();
    }

    private FileData pathToFileData(Path path) {
        FileData fileData = new FileData();
        String filename = path.getFileName()
                              .toString();
        fileData.setFilename(filename);
        fileData.setUrl(MvcUriComponentsBuilder.fromMethodName(FilesController.class, "getFile", filename)
                                               .build()
                                               .toString());
        try {
            fileData.setSize(Files.size(path));
        } catch (IOException e) {
            e.printStackTrace();
            throw new RuntimeException("Error: " + e.getMessage());
        }

        return fileData;
    }

    @GetMapping("{filename:.+}")
    @ResponseBody
    public ResponseEntity<Resource> getFile(@PathVariable String filename) {
        Resource file = fileService.load(filename);
        return ResponseEntity.ok()
                             .header(HttpHeaders.CONTENT_DISPOSITION, "attachment; filename=\"" + file.getFilename() + "\"")
                             .body(file);
    }
}
This class has some interesting annotations:
@RestController- annotation is used to define a Rest controller,@GetMapping,@PostMappingand@DeleteMapping- annotation is for handing HTTP GET, POST and DELETE requests with specific class methods:
| HTTP Method | Endpoint | Method |
| POST | /files | uploadFile() |
| GET | /files | getListFiles() |
| GET | /files/{filename:.+} | getFile() |
| DELETE | /files | delete() |
5.4. Handle upload file exceptions
The class annotated with @ControllerAdvice is responsible for handling specific exceptions that may occur during uploading/downloading files. RestExceptionHandler class beside the special annotation should also extend RestExceptionHandler. To handle the exception when uploading too large files we need to handle MaxUploadSizeExceededException like in the following:
package com.frontbackend.springboot.exceptions;

import com.frontbackend.springboot.model.UploadResponseMessage;
import org.springframework.http.HttpStatus;
import org.springframework.http.ResponseEntity;
import org.springframework.web.bind.annotation.ControllerAdvice;
import org.springframework.web.bind.annotation.ExceptionHandler;
import org.springframework.web.multipart.MaxUploadSizeExceededException;
import org.springframework.web.servlet.mvc.method.annotation.ResponseEntityExceptionHandler;

@ControllerAdvice
public class RestExceptionHandler extends ResponseEntityExceptionHandler {

    @ExceptionHandler(MaxUploadSizeExceededException.class)
    public ResponseEntity<UploadResponseMessage> handleMaxSizeException(MaxUploadSizeExceededException exc) {
        return ResponseEntity.status(HttpStatus.EXPECTATION_FAILED)
                             .body(new UploadResponseMessage("Unable to upload. File is too large!"));
    }
}
Note that we could also handle other exceptions that may occur during processing requests.
5.5. Create application.properties
To define the maximum file size that could be uploaded we need to add the following entries in the application.properties:
upload.path=/uploads

spring.servlet.multipart.max-file-size=700KB
spring.servlet.multipart.max-request-size=700KB
spring.servlet.multipart.max-file-size - this is the maximum file size for each request,
spring.servlet.multipart.max-request-size - the maximum request size for a multipart/form-data.
Additionally, we added the upload.path custom parameter to define our root folder where all the files will be uploaded. This parameter is used in the FileService class.
6. Test Spring Boot upload file application
Find upload-file-into-filesystem-0.0.1-SNAPSHOT.jar in the target folder and Start Spring Boot application by running java -jar upload-file-into-filesystem-0.0.1-SNAPSHOT.jar.
You should see a message similar to this: Started Application in 1.625 seconds (JVM running for 1.98). That means the server started successfully.
To test our uploading/downloading API we used Postman.
6.1. Uploding file
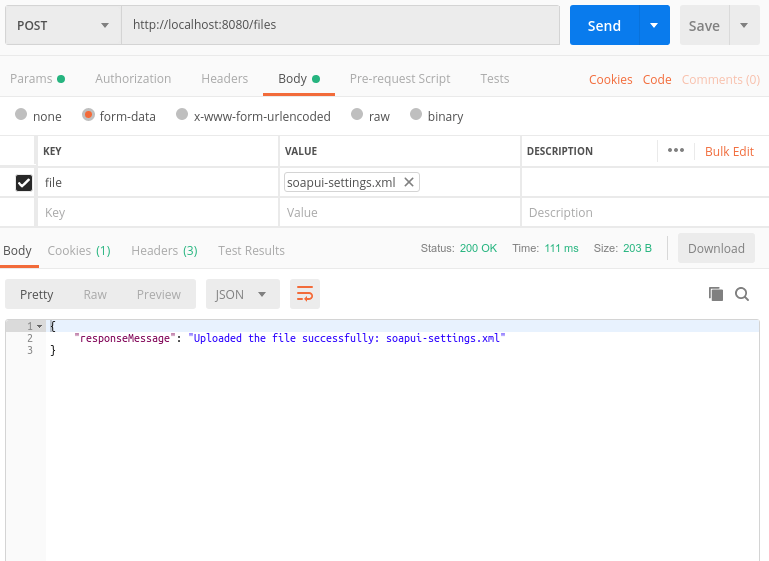
Uploading files returns information about the wrapped in UploadResponseMessage object.
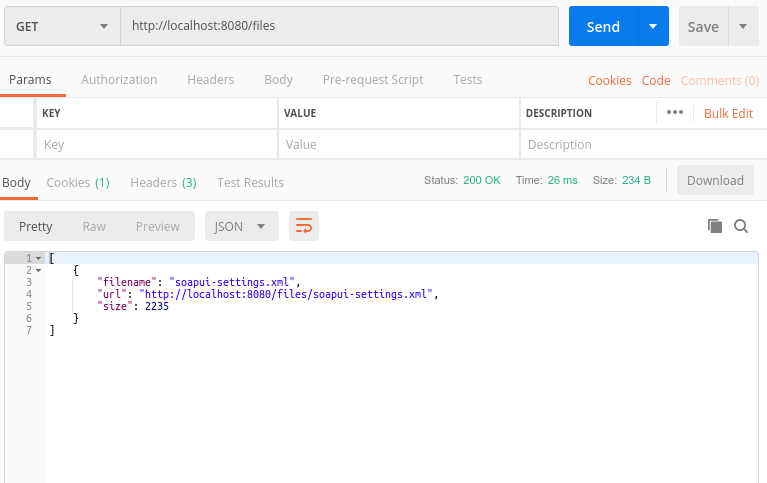
6.2. Get file list
6.3. Delete all files
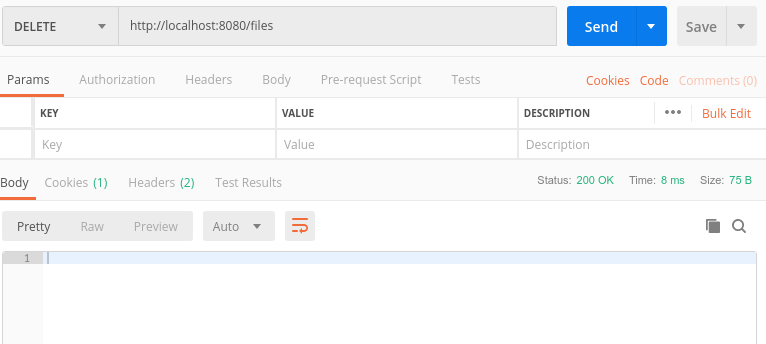
Deleting files will just return HTTP 200 status when successful.
6.4. Empty list after deleting all files
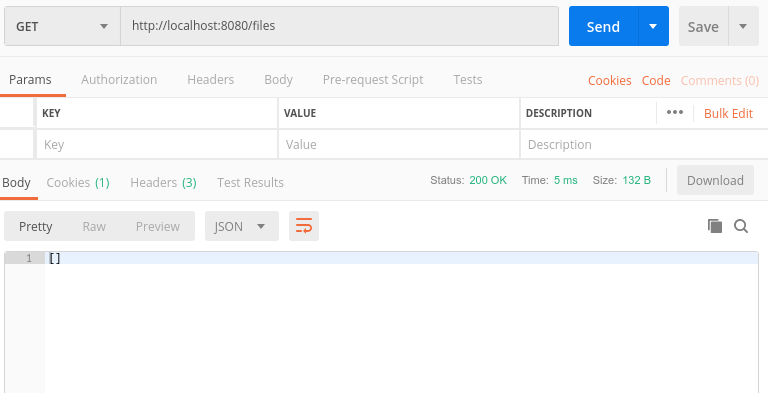
When the upload folder is empty we will get an empty collection on GET request.
7. Conclusion
In this tutorial, we presented how to create a simple Spring Boot application for uploading and downloading files to/from a static folder located somewhere in the filesystem. The application provides a Rest API without any front-end, that's why we tested how it works using Postman tool.
As usual code used in this tutorial is available on our GitHub repository.
{{ 'Comments (%count%)' | trans {count:count} }}
{{ 'Comments are closed.' | trans }}