1. Introduction
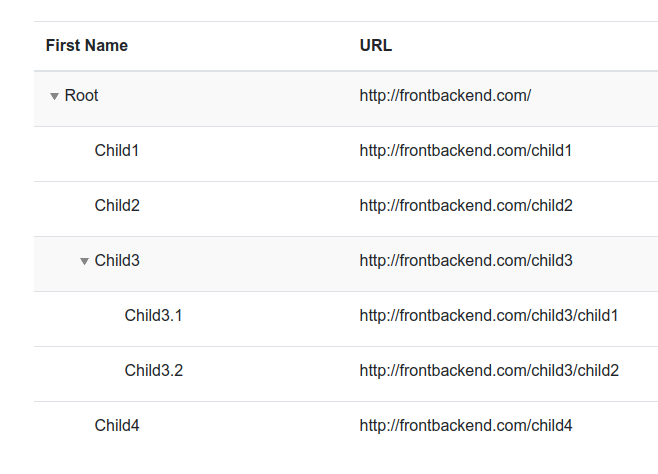
In this article, we are going to present the Thymeleaf Tree Table component. Tree table elements are frequently used in web applications for example: to present folder or employees' hierarchical structure. This tutorial will describe how to create this kind of component and fill them with data generated in the back-end.
If you are looking for more useful articles about Thymeleaf, please check the following links:
Thymeleaf Articles
Create DataTable component in Thymeleaf template
Handle table pagination in Thymeleaf
2. Dependencies
2.1. Maven dependencies
To present how the Thymeleaf Tree Table component works with Thymeleaf we used a simple Spring Boot application created as a Maven project using the following dependencies:
- org.springframework.boot:spring-boot-starter-web:2.1.5.RELEASE - Spring Boot web starter dependency,
- org.springframework.boot:spring-boot-starter-thymeleaf:2.1.5.RELEASE - Thymeleaf template engine dependency,
- org.projectlombok:lombok:1.18.2 - library for generating common methods for POJO objects,
- org.webjars:bootstrap:4.0.0-2 - webjar with Bootstrap framework.
2.2. Front-End libraries
- bootstrap - a UI framework for creating responsive designes,
- jquery-treetable - library for creating tree table components.
Project Maven pom.xml file has the following structure:
<?xml version="1.0" encoding="UTF-8"?>
<project xmlns="http://maven.apache.org/POM/4.0.0"
         xmlns:xsi="http://www.w3.org/2001/XMLSchema-instance"
         xsi:schemaLocation="http://maven.apache.org/POM/4.0.0 http://maven.apache.org/xsd/maven-4.0.0.xsd">
    <modelVersion>4.0.0</modelVersion>

    <artifactId>thymeleaf-bootstrap-treetable</artifactId>

    <properties>
        <bootstrap.version>4.0.0-2</bootstrap.version>
        <webjars-locator.version>0.30</webjars-locator.version>
        <lombok.version>1.18.2</lombok.version>
    </properties>

    <!-- Inherit defaults from Spring Boot -->
    <parent>
        <groupId>org.springframework.boot</groupId>
        <artifactId>spring-boot-starter-parent</artifactId>
        <version>2.1.5.RELEASE</version>
    </parent>

    <!-- Add typical dependencies for a web application -->
    <dependencies>
        <dependency>
            <groupId>org.springframework.boot</groupId>
            <artifactId>spring-boot-starter-web</artifactId>
        </dependency>

        <dependency>
            <groupId>org.springframework.boot</groupId>
            <artifactId>spring-boot-starter-thymeleaf</artifactId>
        </dependency>

        <dependency>
            <groupId>org.webjars</groupId>
            <artifactId>bootstrap</artifactId>
            <version>${bootstrap.version}</version>
        </dependency>

        <dependency>
            <groupId>org.webjars</groupId>
            <artifactId>webjars-locator</artifactId>
            <version>${webjars-locator.version}</version>
        </dependency>

        <dependency>
            <groupId>org.projectlombok</groupId>
            <artifactId>lombok</artifactId>
            <version>${lombok.version}</version>
            <scope>provided</scope>
        </dependency>
    </dependencies>

    <!-- Package as an executable jar -->
    <build>
        <plugins>
            <plugin>
                <groupId>org.springframework.boot</groupId>
                <artifactId>spring-boot-maven-plugin</artifactId>
            </plugin>
        </plugins>
    </build>

</project>
3. Web Controller, Tree Node, and Main Application class
In the model layer, we have a single object Node that will be used to create a hierarchical structure. This structure will be flat for the sake of simplicity.
package com.frontbackend.thymeleaf.bootstrap.model;

import lombok.Getter;
import lombok.Setter;

@Setter
@Getter
public class Node {

    private String nodeId; // node id
    private String pid; // parent id
    private String text;
    private String href;

    public Node(String nodeId, String pId, String text, String href) {
        this.nodeId = nodeId;
        this.pid = pId;
        this.text = text;
        this.href = href;
    }
}
Node class contains a unique identifier in the fields: nodeId. To create tree structure we have pid field that points to the parent element.
NodeConroller will be responsible for returning sample tree table data for GET /nodes requests:
package com.frontbackend.thymeleaf.bootstrap.controller;

import java.util.ArrayList;
import java.util.List;

import org.springframework.web.bind.annotation.GetMapping;
import org.springframework.web.bind.annotation.RequestMapping;
import org.springframework.web.bind.annotation.RestController;

import com.frontbackend.thymeleaf.bootstrap.model.Node;

@RestController
@RequestMapping("nodes")
public class NodesController {

    @GetMapping
    public List<Node> nodes() {
        return getSampleNodeList();
    }

    private List<Node> getSampleNodeList() {
        List<Node> nodes = new ArrayList<>();
        nodes.add(new Node("Root", "0", "Root", "http://frontbackend.com/"));
        nodes.add(new Node("Child1", "Root", "Child1", "http://frontbackend.com/child1"));
        nodes.add(new Node("Child2", "Root", "Child2", "http://frontbackend.com/child2"));
        nodes.add(new Node("Child3", "Root", "Child3", "http://frontbackend.com/child3"));
        nodes.add(new Node("Child3.1", "Child3", "Child3.1", "http://frontbackend.com/child3/child1"));
        nodes.add(new Node("Child3.2", "Child3", "Child3.2", "http://frontbackend.com/child3/child2"));
        nodes.add(new Node("Child4", "Root", "Child4", "http://frontbackend.com/child4"));
        return nodes;
    }
}
The Application is the Java class with the main method that starts the Spring Boot application server:
package com.frontbackend.thymeleaf.bootstrap;

import org.springframework.boot.SpringApplication;
import org.springframework.boot.autoconfigure.SpringBootApplication;

@SpringBootApplication
public class Application {

    public static void main(String[] args) {
        SpringApplication.run(Application.class, args);
    }
}
4. Templates
In the presentation layer, we have only one Thymeleaf template - index.html - the main view.
The index.html template has the following structure:
<!DOCTYPE HTML>
<html lang="en" xmlns:th="http://www.thymeleaf.org">
<head>
    <meta charset="UTF-8"/>
    <title>Spring Boot Thymeleaf Application - Bootstrap Tree Table</title>

    <link th:rel="stylesheet" th:href="@{assets/jquery-treetable/jquery.treetable.css}"/>
    <link th:rel="stylesheet" th:href="@{assets/jquery-treetable/jquery.treetable.theme.default.css}"/>
    <link th:rel="stylesheet" th:href="@{webjars/bootstrap/4.0.0-2/css/bootstrap.min.css} "/>
</head>
<body>

<!-- Navigation -->
<nav class="navbar navbar-expand-lg navbar-dark bg-dark static-top">
    <div class="container">
        <a class="navbar-brand" href="/">Thymeleaf - Bootstrap Tree Table</a>
        <button class="navbar-toggler" type="button" data-toggle="collapse" data-target="#navbarResponsive"
                aria-controls="navbarResponsive"
                aria-expanded="false" aria-label="Toggle navigation">
            <span class="navbar-toggler-icon"></span>
        </button>
        <div class="collapse navbar-collapse" id="navbarResponsive">
            <ul class="navbar-nav ml-auto">
                <li class="nav-item active">
                    <a class="nav-link" href="#">Home
                        <span class="sr-only">(current)</span>
                    </a>
                </li>
                <li class="nav-item">
                    <a class="nav-link" href="#">About</a>
                </li>
                <li class="nav-item">
                    <a class="nav-link" href="#">Services</a>
                </li>
                <li class="nav-item">
                    <a class="nav-link" href="#">Contact</a>
                </li>
            </ul>
        </div>
    </div>
</nav>

<div class="container">

    <div class="row">
        <div class="col mt-5">

            <table id="treeTable" class="table">
                <thead>
                <tr>
                    <th>First Name</th>
                    <th>URL</th>
                    <th>Action</th>
                </tr>
                </thead>
            </table>

        </div>
    </div>

</div>

<script th:src="@{/webjars/jquery/jquery.min.js}"></script>
<script th:src="@{/webjars/popper.js/umd/popper.min.js}"></script>
<script th:src="@{/webjars/bootstrap/js/bootstrap.min.js}"></script>
<script th:src="@{/assets/jquery-treetable/jquery.treetable.js}"></script>

<script type="text/javascript">
    $(document).ready(function () {
        $.ajax({
            "type": 'get',
            "url": '/nodes',
            "dataType": "json",
            "success": function (data) {
                $.each(data, function (idx, obj) {
                    $("#treeTable").append("<tr data-tt-id=\"" + obj.nodeId + "\" data-tt-parent-id=\"" + obj.pid + "\"><td>" + obj.text + "</td><td>" + obj.href + "</td><td><button id=\"" + obj.nodeId + "\">edit</button><button id=\"" + obj.nodeId + "\">delete</button></td></tr>");
                });
                $("#treeTable").treetable({
                    expandable: true,
                    initialState: "expanded",
                    clickableNodeNames: true,
                    indent: 30
                });
            }
        });
    });
</script>

</body>
</html>
5. The output
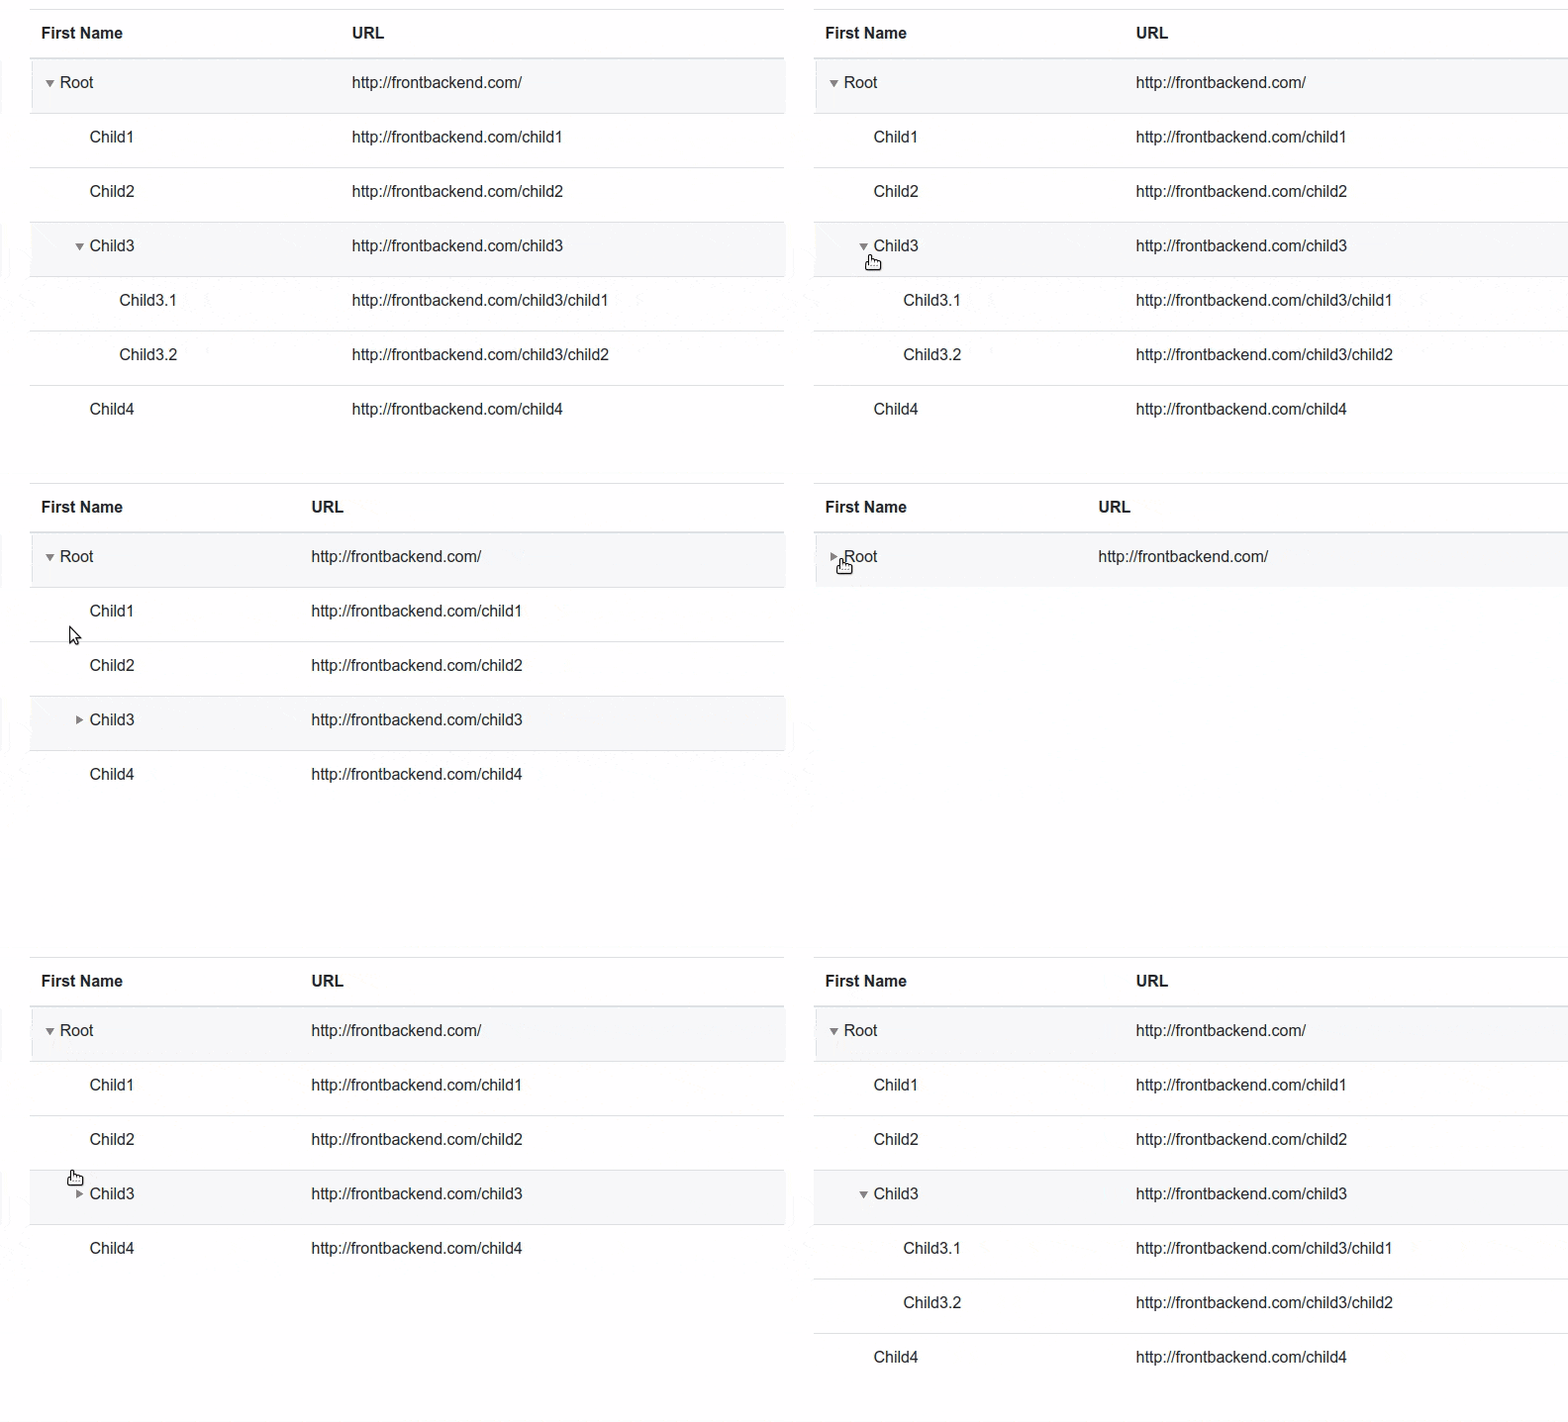
The running application is available under http://locahost:8080 URL and presents the following functionality:

6. Conclusion
In this article, we presented how to use Tree Table components in Thymeleaf templates.
As usual, the code used in this article is available under our GitHub repository.
{{ 'Comments (%count%)' | trans {count:count} }}
{{ 'Comments are closed.' | trans }}